How to Enable, Disable, and Purge Varnish Cache in cPanel
When you want to improve website performance using caching. This article explains how to enable, disable, and purge Varnish cache in cPanel, along with important limitations, cache behavior, HTTPS restrictions, and performance considerations.
Overview
Varnish is a Web Application Accelerator which is used to Cache Static Content such as Images, CSS, and HTML. It is used to increase the Performance of High Traffic Websites.
How Do I Enable Varnish?
Follow the steps below to enable Varnish for your website:
Step 1: Log in to the Cpanel of the Domain Name for Which You Wish to Enable Varnish
-
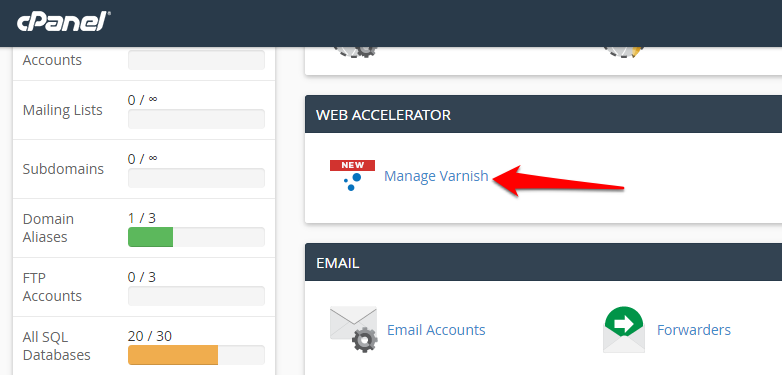
Click on Manage Varnish under the Web Accelerator section.
-
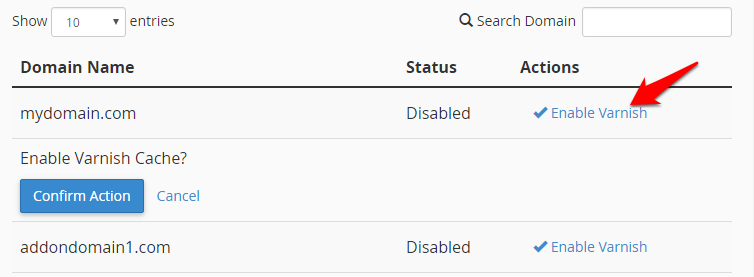
Click on Enable Varnish.
-
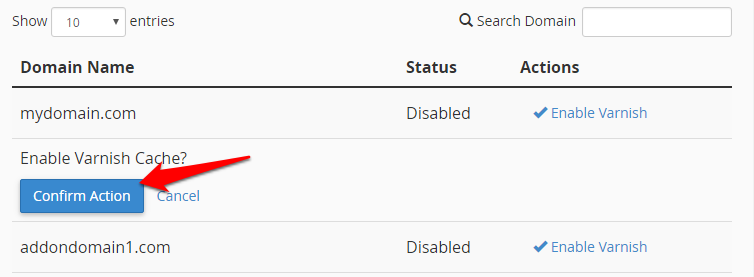
Click on Confirm Action.
How Do I Purge the Varnish Cache?
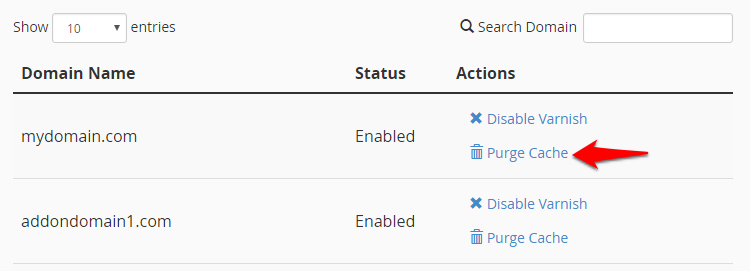
You can purge the cache by clicking on Purge Cache under Action next to any domain.
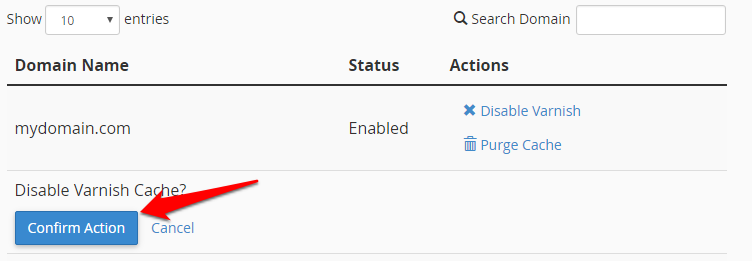
How Do I Disable Varnish?
Follow the steps below to disable Varnish for your website:
Step 1: Log in to the cPanel of the domain name for which you wish to disable Varnish.
-
Click on Manage Varnish under the Web Accelerator section.
-
Click on Disable Varnish.
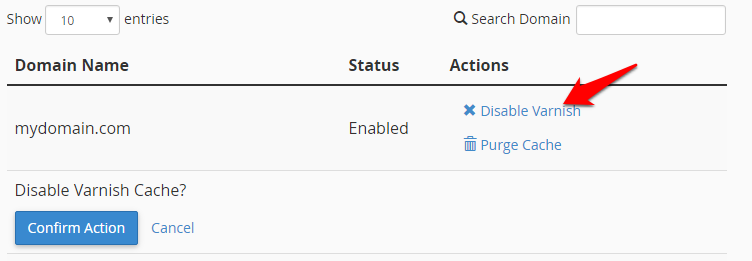
- Click on Confirm Action.
Note:
-
Varnish is currently available only on the Shared Linux hosting servers based in the US.
-
Websites requiring dynamic content might not display correct content when Varnish is enabled.
-
Varnish will not serve sites running on HTTPS.
-
Analytics and logs of websites with Varnish enabled may not show complete data.
-
Changes made to the website might not show up till the cache has been manually purged or the stored cache on the server expires.
-
The default cache expiry for Varnish is 15 minutes.
-
If your website does not work as intended, it’s recommended that you immediately disable Varnish for the affected domain name.