
As a web pro, one of the things you need to manage your business website effectively is a control panel. cPanel is a popular web-based dashboard that helps you with many administrative tasks. In this article, we’ll see how to use cPanel to create a website in some simple steps.
What is cPanel?
cPanel is a web-based graphical control panel that helps you create websites and manage your web hosting account. It has a simple setup and features. We at ResellerClub also help our customers manage their products with cPanel, which comes with Dedicated Server Hosting, Cloud Hosting, Shared Hosting and Reseller Hosting.
Features of cPanel
- Highly Secure:
This is one of the most important features of any product or software. cPanel provides utmost security and is protected by password-protected directories, SSL/TLS, GnuPG Key and IP address denial. - Easy File Management:
cPanel helps in monitoring your customer’s website for optimal disk space usage, editing and taking a backup of folders and files, making the work of the user easier. - Safe Server Management:
cPanel also provides easy server management that’s available to Dedicated and VPS servers through command line scripts. They help maintain and resolve issues with the servers like performing system backup, automating account suspensions, restarting the server through SSH, restoring an account and more.(try adding these as bullet points same for the other points) - Powerful Email:
cPanel can be used to create & manage multiple email accounts, forwarders and autoresponders as well as access email through clients such as RoundCube etc. It also helps block spam and creates filters to help enable this.
How to use cPanel to Create a Website:
There are two ways to create your website using cPanel:
- You can use cPanel’s File Manager to see the files on your root server and upload files from there.
- The second is to create your website on a CMS such as WordPress using cPanel. We’ve covered this earlier on our blog and you can read it here.
In this blog post, we’ll be covering the first method, using cPanel to create a website.
Step I: Domain Name Registration and Hosting
Step I involves choosing the right domain name for your website. This is very essential as your domain name is your first identity to a potential customer. When performing domain name registration, I would recommend two things if you have the following websites.:
- Personal Website: You can unleash your creativity when it comes to personal domain names. However, be thoughtful when doing so. Having a food website with the name travelogue.com can be misleading and you may have difficulty with customer retention.
- Business Website: Choosing the right domain name for a business website ensures effective branding and marketing for your website. When selecting your domain, ensure that it truly represents your company.
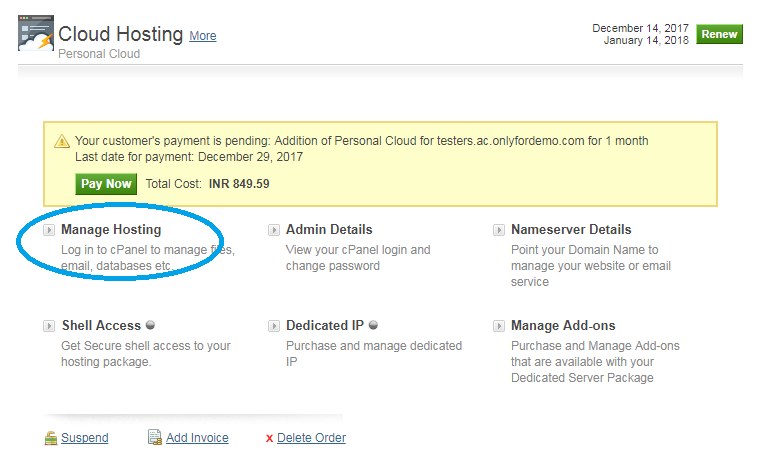
To host your website, there are several web hosting services available like WordPress Hosting, Shared Hosting, Cloud Hosting and more. In the example here, I chose Cloud Hosting to host this website using cPanel. You can go to your cPanel by clicking on ‘Manage Hosting’ in your control panel
Step II: Open cPanel File Manager
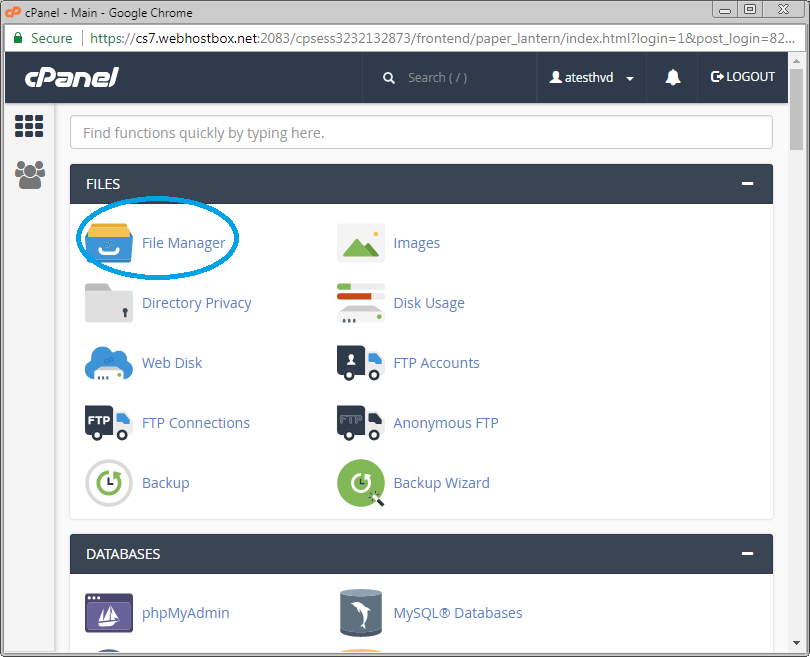
- Once you login to your cPanel account, click on ‘File Manager’ in the Files section.
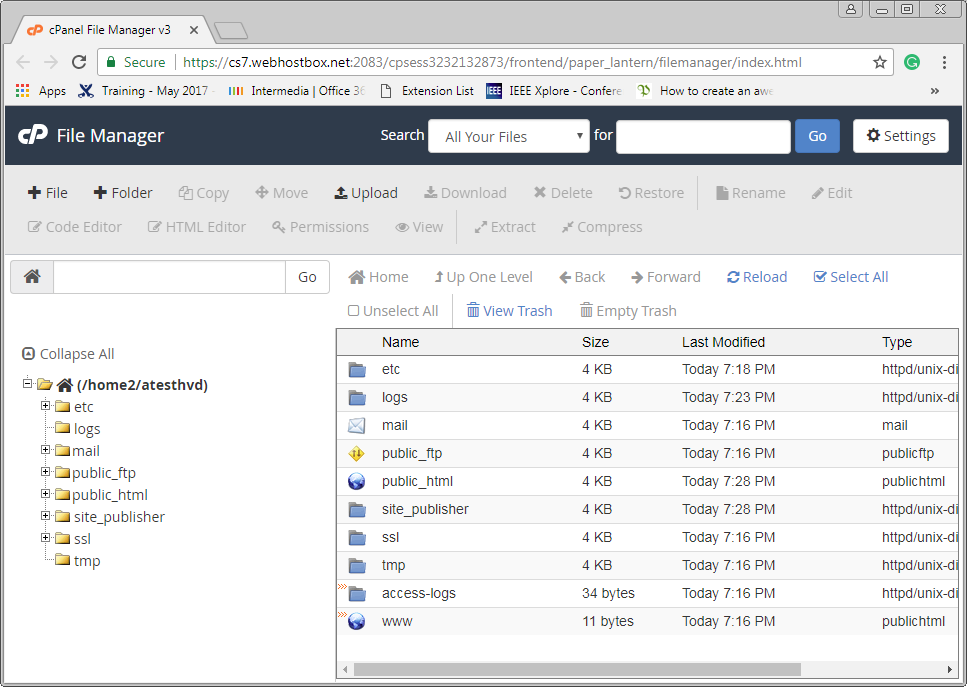
- Once you click File Manager, the following window will open with several folders. From here you can directly upload or create new files. Click on public_html folder and you will find another folder inside it.
- Since this is our demo account the folder is empty. We’ll be creating our own file in the folder inside public_html and name it as index.php
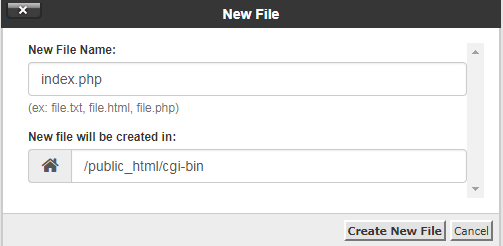
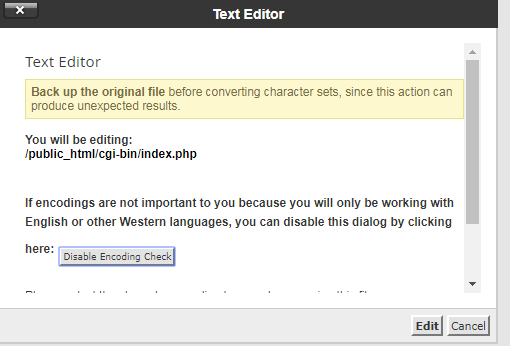
- Now click on ‘Create New File’ and a message will pop up confirming your edit. Click on ‘edit’ and a blank window editor will open. Here is where you code. For our simplicity, we’ve simply written the most basic PHP code.
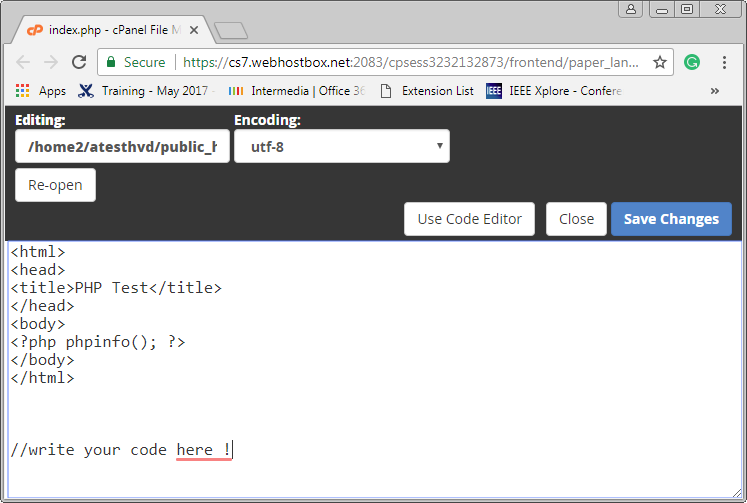
- Next, click ‘Save Changes’ and reload your Domain Name URL to see the changes. Since I’ve done this using the demo account, the changes won’t be reflected.
Conclusion:
On completion of the above steps, you will have successfully created your website. You can now customize it as you wish. We hope this demo helped you understand how to use cPanel to create and edit a website.
If you would like to share some tips or would like more tutorials from us, leave us a comment below and we will definitely do a post on that.
Reseller Club Hosting Services
Reseller Hosting | Windows Reseller Hosting | Cloud Hosting | VPS Hosting | Managed VPS Hosting | Dedicated Server Hosting | Windows Dedicated Server | Managed Dedicated Server | Linux Shared Hosting | Windows Shared Hosting


